Posts

Aframe time-lapse

Image
                                          Awesome Crew from Nova Scotia!                                         Music by Bensound.com/royalty-free-music                                         License code: OS9SSU5OIOSHRNEL

Life by the lake

Image
 

Well pump going in

Image
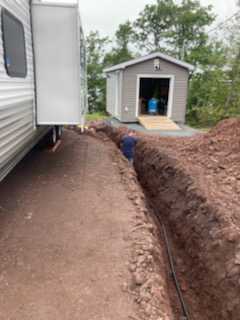
  A lot of things I learned from this crew about running well water, which is always interesting to know for a home owner.  First it needs a submersible pump 80 feet down from the well cap, 20 feet above the bottom of the well. Then it runs both water and electrical lines under the frost line (4 feet deep in this area) to the 20 gallon pressure tank located inside the shed. Sand and Styrofoam was laid to protect underground water line. They also wrapped a heated mat around the water line to winterize the line as shed is not insulated for the winter. We will have to drain the pressure tank before it freezes, any remaining water under ground will be okay because of the heated mat.  They also installed two sewer drain pipes for both my trailer and the shed. In the future I might install a sink inside the shed.  The pressure tank and pump is up and running by the end of the day 7pm. What a hard working crew!  All the plumbing for water inside the shed I am planning DIY, a small job I can m

Power is connected to the shed

Image
Just in time to get electricity before the well pump installation! Great!  

Storage Shed moved in

Image
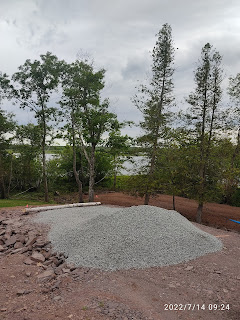
Shed supplier told us this week, it is finally ready to ship and set it for us. Because we wanted the shed out of the way from our future cottage building, we plan to put shed on the edge of the padding, where it has a bit slop.  Adding a 2" clean crush rock base seems the easiest and cheapest solution to create a leveled pad for the shed, and it will be good for drainage under the shed anyway. We used 5 yard rock and took us 3 hours to make it as flat, as compact as we can.                                    The driver told me the truck just made the max height limit when he crossed the bridge - the only way to get here if you don't want drive another extra hundred kilometers through another town. They used car jacks to make sure the shed is leveled on the ground after it's off the truck bed. It was a tedious process with a lot of back forth adjustment. It is well done at the end and looks good, even comes with a ramp for the garage door.  The only thing I need to do is t

Well drilled today

Image
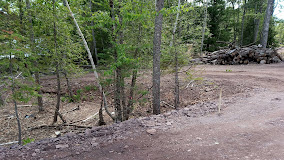
Well drilling company decided the exact location to be by the side of the entrance as we didn't had much choice, the code requires 65 feet away from our septic field, and this is the only spot above flood line within the property. This means we have to make more padding to give access to the drilling truck. Oh well, that's another 7 load fills needed, it added a couple thousands more to the cost.  We couldn't be happier when we saw the end result, as it creates a bit parking space on that side of road.                  

Spring is here at the Lake!

Image
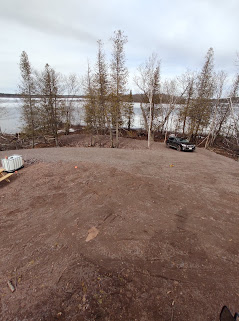
  Spring is finally here at the Lake, also means flood season is near by the corner... Mother nature works tirelessly, from ice to water this happened just in the past month.  We had a few good rains in the last few days, 25 mm one day, and the water table was rising fast after those good rains. Fortunately, the ice started melting a month ago slowly and steadily, even with these rains, the flood doesn't look bad for this year, yet!     This place is so peaceful, we can hear nothing but nature sounds. Birds are chirping on early mornings. Near dusk, we often see Bucks families coming out of woods to play and eat. Thanks to Government of Canada Water Office for the Real-Time Hydrometric Data. The recorded historical high is about two and half meters higher than today's measurement. 

First Time Lapse Video

Image
  Here goes the first video editing. On this cold Friday morning I am heading to the cottage. I am probably going to pay for the full version of Movavi, so the water mark is not always in the middle of screen. The program seems very easy to work with, and the video quality weren't lost, but Youtube has compressed the video quite a bit, which shows much lower video quality compared to my local copy. I have got some work to do to preserve video quality when uploading to Youtube.

Making a Time Lapse Camera - 1

Image
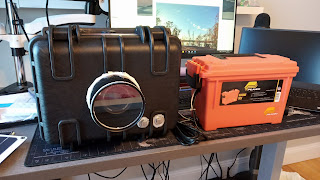
I thought it would be super cool to create a time-lapse of the cottage being built. With a bit of research, I decided to make a fun side project and here it goes with the steps I went through. Hopefully it will be helpful for you.  A standard DSLR camera is what I used for making time lapses with decent quality images. To capture time lapse for months and being on the construction site, I needed an external power source and somewhat weather proof.  Material list: Canon EOS 400D with standard 18-55 mm zoom lens, $500, I had one collecting dust for a quite while as you can see from the old model number 32 GB SanDisk compact flash memory card, to give about 6500 pictures with high quality, $45 Canon intervalometer for time controller, $35 DC 5V - DC 8.4V coupler, to connect camera dummy battery and USB power bank, $32 10400 mAh RavPower USB power bank with DC 5V 2.1A output, for powering the camera, $35 Dummy battery for the camera, so it can draw power from an external source, such as US
Septic is on the go

Image
  The color is beautiful everywhere, its a treat to drive by and see the lot. In front of the padding area, we are going to add a 2000 gallon tank for the septic system. It should be done in a week.